
New Features
Single Sign On login
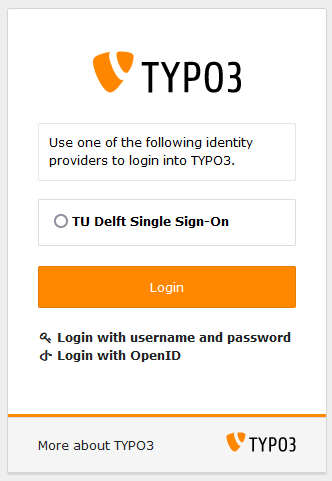
You can now login using your TU Delft netid.
We've (finally) implemented a new, secure login procedure with Single Sign On.
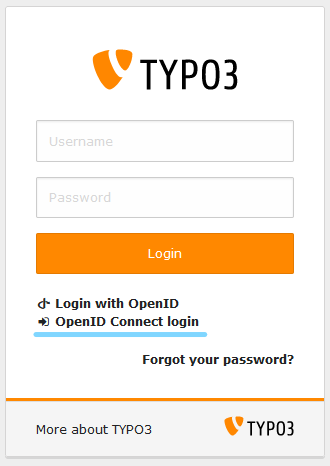
This way, you can login with your netid credentials and not have to maintain a separate account for TYPO3. You can already start using it by selecting [OpenID connect] on the login screen.
In the next few weeks we'll be moving forward with this new login procedure, making it mandatory. All editors will be notified beforehand. Sharing your account was never allowed, but from then on will actually be impossible.
Grid settings - Accordion frame
A more flexible way of creating (+) accordion items, using any Grid element you want.
Throughout the years, we've experimented with different ways to create so-called 'accordions' on our site; at first it was a standalone element, with limited editing features, which we then changed into accordion grids. However, the downside of this grid was the hard limit to the amount of accordions, making it unpractical to work with at times. This made us look into it once again and we feel we've now created an even more flexible, versatile way to add accordions to a page; our new Accordion frame setting.
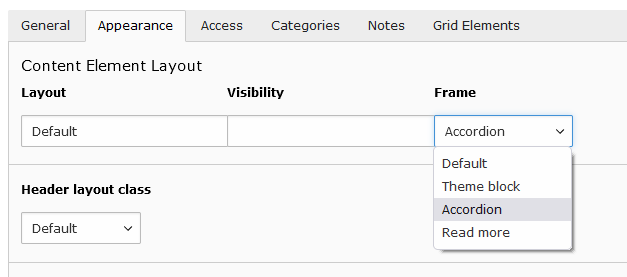
You can now take any Grid element you prefer, and at the Frame option (Appearance tab, see screenshot below) you can set the grid type to Accordion. All direct children elements in the grid will now have a (+).
Want to group items together? Put them into a Grid element. This Grid element will then be the direct child of the Accordion grid, and act as one accordion item with all its content.
-
Lorem Ipsum is simply dummy text of the printing and typesetting industry. Lorem Ipsum has been the industry's standard dummy text ever since the 1500s, when an unknown printer took a galley of type and scrambled it to make a type specimen book. It has survived not only five centuries, but also the leap into electronic typesetting, remaining essentially unchanged. It was popularised in the 1960s with the release of Letraset sheets containing Lorem Ipsum passages, and more recently with desktop publishing software like Aldus PageMaker including versions of Lorem Ipsum.
-
By changing the 'frame'-setting of your grid to 'accordion', you can easily create the (+)
By opening the following accordion, you'll see the images of how to set the grid to an 'accordion'
How to select the accordion 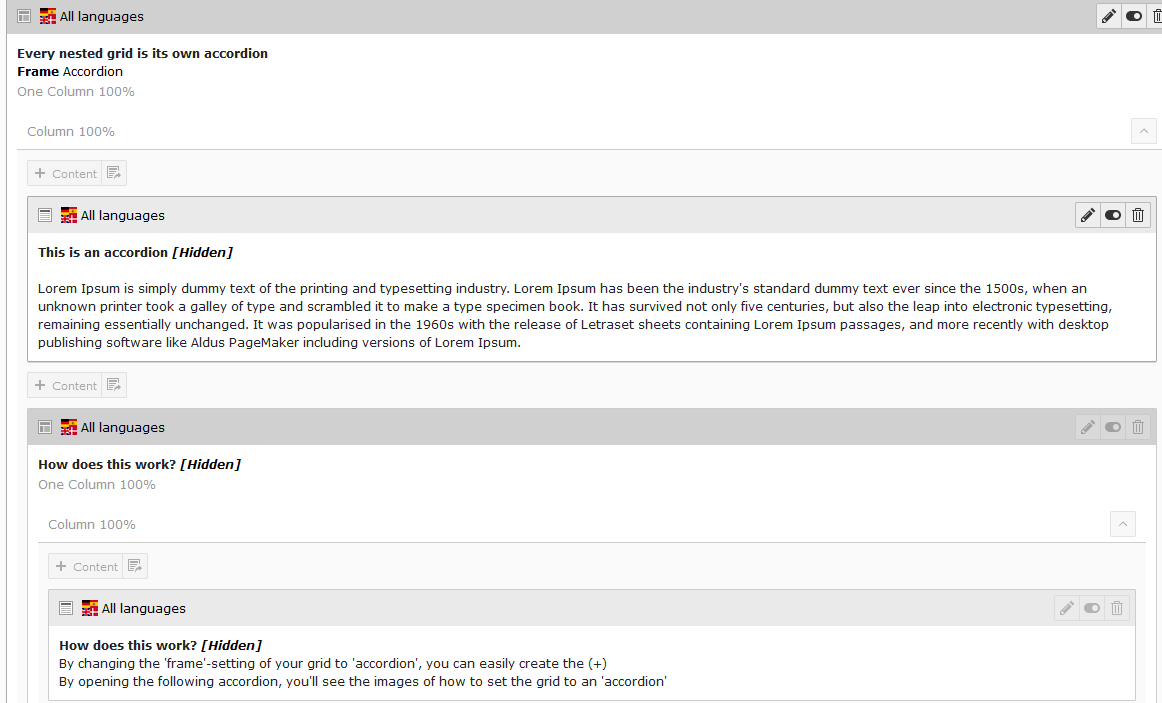
What the backend looks like
25-75 grid
An extra grid configuration with a smaller left column.
A simple addition to our collection of grids; the 25-75 was one of the few grids that was still missing, so we took the opportunity to fix this.
Below is shown how this grid reacts on the different screensizes. You can check this yourself by resizing your browser window.
The left colum:
25% on desktop
50% on tablet
100% on mobile
The right column:
75% on desktop
50% on tablet
100% on mobile
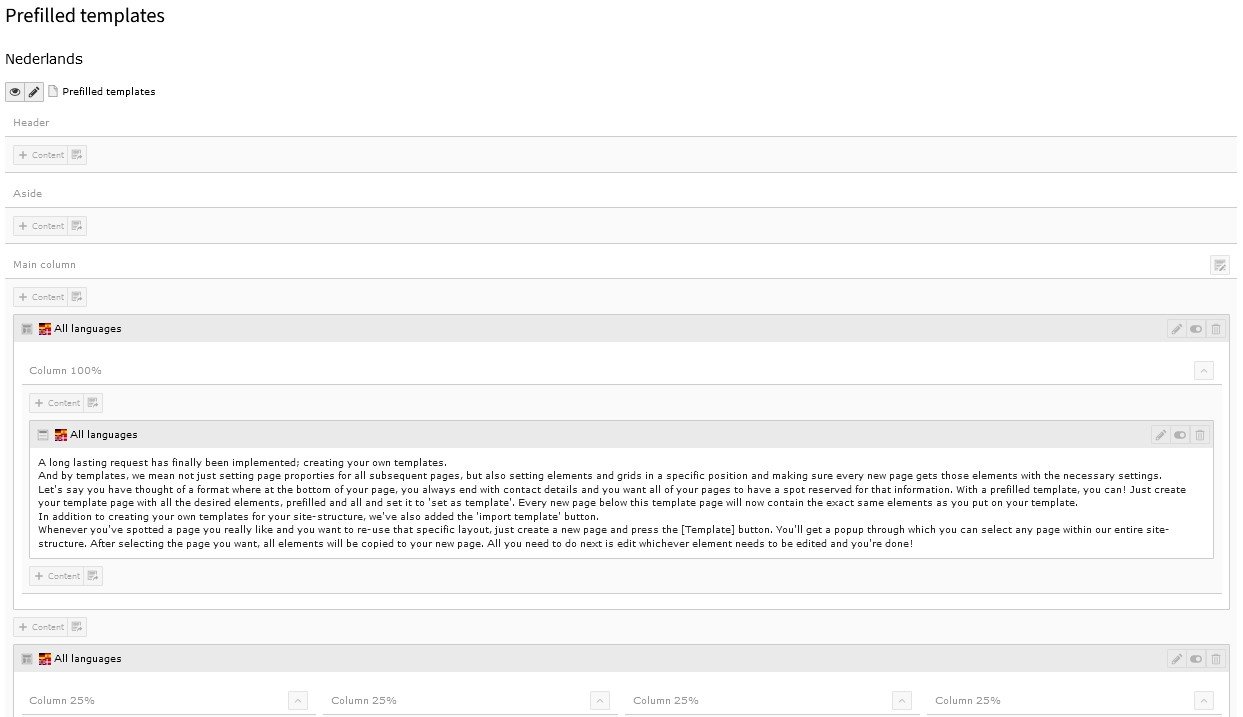
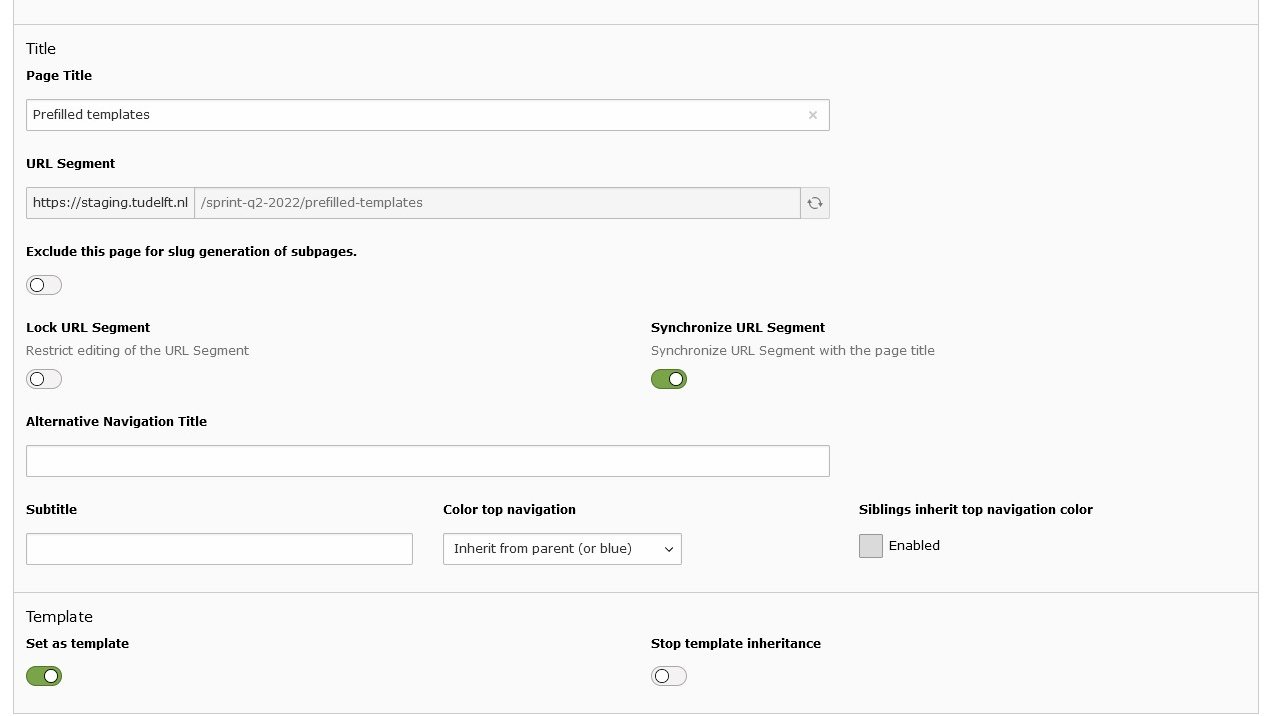
Prefilled templates
You can now use existing pages as a Template for new pages, either automatically or manually.
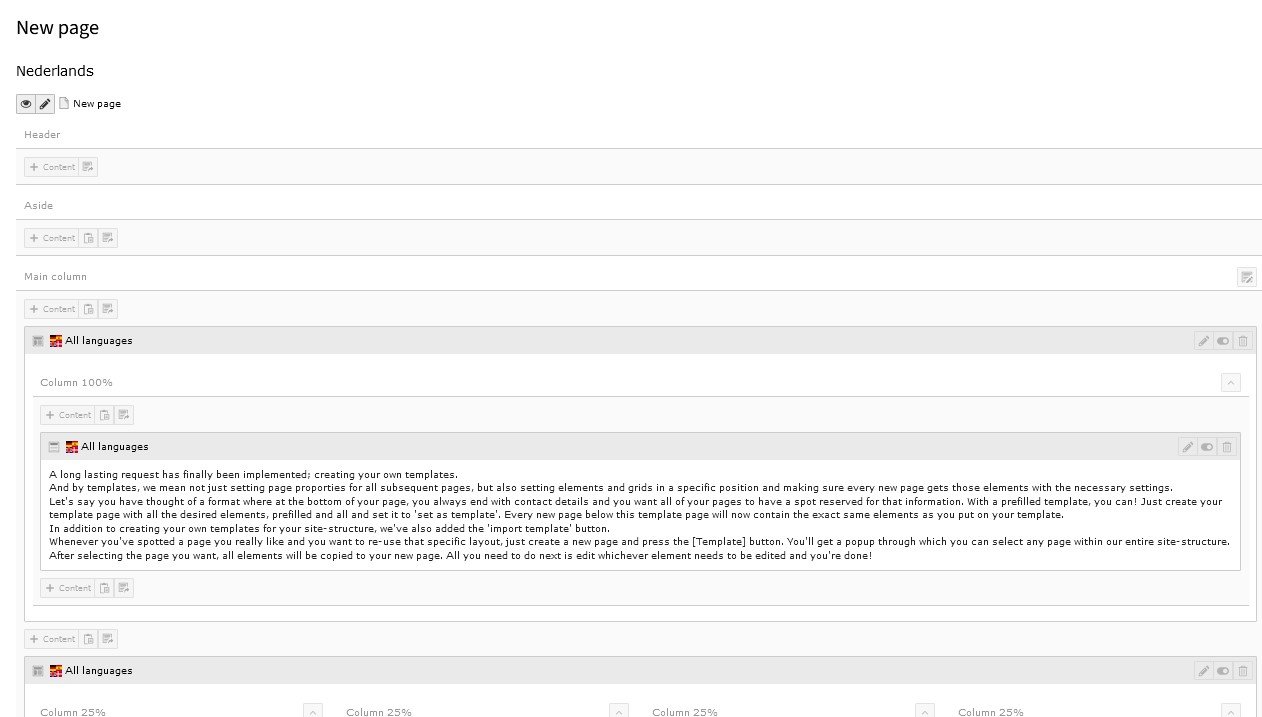
A long lasting request has finally been implemented; creating your own templates. This option will copy the entire content of an existing page to a new page you are creating. This will allow you to make, for instance, one 'project' template, and use it for all subsequent projects you create.
There are two separate options:
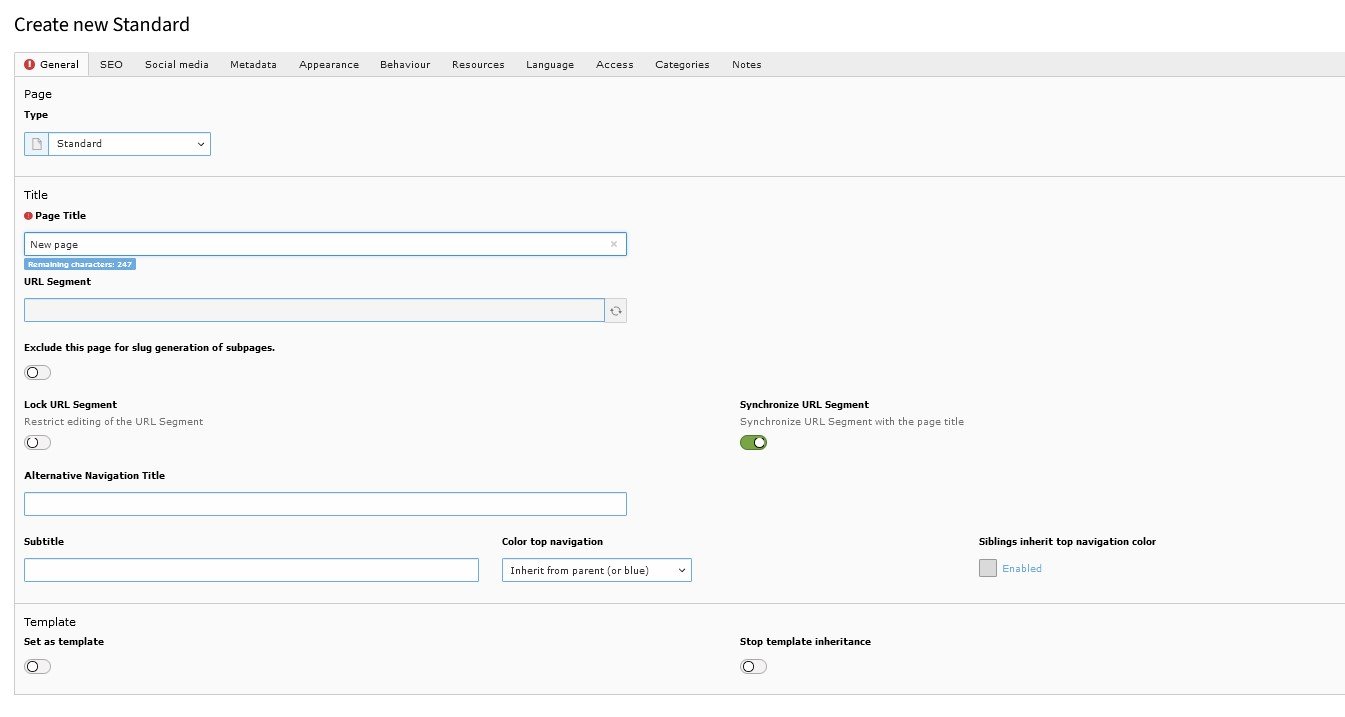
1) Automatically let every new page use its parent page as a Template
2) Manually import a page as a one-time Template on a new page
Notice
Automatic templates can present problems if used wrongfully (e.g. when set on a homepage). Therefore, this option is only available to your local content manager or through functioneelbeheer-mc@tudelft.nl.
However, it's one click of a button, so please don't hesitate to ask.
Let's say you have thought of a format where at the bottom of your page, you always end with contact details and you want all of your pages to have a spot reserved for that information. With a prefilled template, you can! Just create your template page with all the desired elements, prefilled and all, and in the page properties, select 'Set as template'. Every new page below this template page will now contain the exact same elements as you put on your template.


Stopping the templating feature on deeper levels
If you have a hierarchical structure of, for instance, 'Template Page -> Project Page - Subpage', and you want the Project page to use the Template, but not the Subpage, you can stop the inheritance of the Template by selecting this option in the Project Page properties.
Whenever you've spotted a page you really like and you want to re-use that specific layout, just create a new page and press the [Template] button. You'll get a popup through which you can select any page within our entire site-structure. After selecting the page you want, all elements will be copied to your new page. All you need to do next is edit whichever element needs to be edited and you're done!


Sidescrolling with the Multirow grid
You can now put content in a horizontally scrolling grid; swipe left or right to see more content.
Previously we had the ability to use sidescrolling when making either a caroussel, image gallery or automatic content overview. What was sorely missing was the ability to create sidescrolling with regular content elements, but we fixed this by adding it to our Multirow grid.
First you create a Multirow grid and define the column settings. Then, add your content to the Multirow grid. Each direct child of the Multirow grid will become its own item in the horizontal scrolling grid.
If you want to group items together, create a Grid element inside the Multirow, in which you then put the grouped content.
Down the Rabbit-Hole
Alice was beginning to get very tired of sitting by her sister on the bank, and of having nothing to do: once or twice she had peeped into the book her sister was reading, but it had no pictures or conversations in it, “and what is the use of a book,” thought Alice “without pictures or conversations?”
So she was considering in her own mind (as well as she could, for the hot day made her feel very sleepy and stupid), whether the pleasure of making a daisy-chain would be worth the trouble of getting up and picking the daisies, when suddenly a White Rabbit with pink eyes ran close by her.

There was nothing so very remarkable in that; nor did Alice think it so very much out of the way to hear the Rabbit say to itself, “Oh dear! Oh dear! I shall be late!” (when she thought it over afterwards, it occurred to her that she ought to have wondered at this, but at the time it all seemed quite natural); but when the Rabbit actually took a watch out of its waistcoat-pocket, and looked at it, and then hurried on, Alice started to her feet, for it flashed across her mind that she had never before seen a rabbit with either a waistcoat-pocket, or a watch to take out of it, and burning with curiosity, she ran across the field after it, and fortunately was just in time to see it pop down a large rabbit-hole under the hedge.
In another moment down went Alice after it, never once considering how in the world she was to get out again.
The rabbit-hole went straight on like a tunnel for some way, and then dipped suddenly down, so suddenly that Alice had not a moment to think about stopping herself before she found herself falling down a very deep well.

Background images on grids
Add a background image to your grid for more visual impact.
With this release comes the option to add an image to your grid as a background image, instead of 'just' a colored grid, creating the possibility to style your content even more appropriately.
When adding the image to your grid through the appearance tab, you also get to set its opacity, so if you feel the image is too dominant, you can scale it down a bit and vice versa.
So how does this work?
Just open the grid-element and select the Appearance tab. At the bottom, you'll notice the File section; this is where you select your image to use as a background image. And with the opacity slider, you can make sure the image is visible but not too overwhelming.
Good to know
- Please keep in mind that unlike regular images, you can not select an image crop or a focal point, due to the way a background image is positioned/coded. So keep in mind to use images that don't rely on specific details in order to get the best results.
- You can add another grid to your element and set that to a specific theme color in order to create a colored text field; as always, feel free to experiment with these combinations.
- Also, you can combine a background image with a background color, using the opacity setting. This way, you can make the image 'fade' to a specific color.

Example 1
A theme color text block over a background image
Example 2
A text over a background image with 25% opacity
Example 3
A text over a background image with 25% opacity, combined with a purple background
Card inheritance
Automatically fill a Card element with the metadata from the page you are linking to.
Did you know that besides the regular card, we also had the 'pillar'-element, which could automatically show content from it's linked item? So if you created that element and made a link to any other page within TYPO3, it would automatically display it's title, subtitle, abstract and/or image?
No? That's what we thought too... But this feature itself can be very useful, so we took the opportunity to add/combine this with the regular, and better known, card element.
Just select the set of information you wish to inherit from the linked page. Flip the toggles, and you can just create a card like you're used to.
Also good to know: you can easily overwrite the inherited fields by just filling out the fields in your element; this does not affect the original content.

Add to calendar button
Add events to your own calendar (Outlook, Google calendar, Apple)
This one is quite simple; we've added a 'add to calendar' link on the event type pages.
So if you create a page as a [TU event], it will automatically add this link to the eventtime and -date field. Different formats are supported (google calendar, ical etc.)
Colored grid height auto-align
Set the same maximum height for all colored columns in a grid
Recognize the following? Creating multiple columns with a background color and getting different heights?
A bit of an experimental feature, but up until recent you could get different colored grids on your page, within the same row. But they never seem to really fit; the heights were always set to the content of each column (see first example below).
Now, by giving the grid a flexbox (thus changing the setting to ' Enable equal column height ' ), all the colored grids within that row will be set to the same height as can be seen in the second example.
Additionally (and also somewhat experimental); most elements get an extra padding at the bottom, creating more empty space. Since this can be really annoying, you can toggle the 'column spacing bottom' setting, removing that unwanted extra padding.
Down the Rabbit-Hole
Alice was beginning to get very tired of sitting by her sister on the bank, and of having nothing to do: once or twice she had peeped into the book her sister was reading, but it had no pictures or conversations in it, “and what is the use of a book,” thought Alice “without pictures or conversations?”
So she was considering in her own mind (as well as she could, for the hot day made her feel very sleepy and stupid), whether the pleasure of making a daisy-chain would be worth the trouble of getting up and picking the daisies, when suddenly a White Rabbit with pink eyes ran close by her.
There was nothing so very remarkable in that; nor did Alice think it so very much out of the way to hear the Rabbit say to itself, “Oh dear! Oh dear! I shall be late!” (when she thought it over afterwards, it occurred to her that she ought to have wondered at this, but at the time it all seemed quite natural); but when the Rabbit actually took a watch out of its waistcoat-pocket, and looked at it, and then hurried on, Alice started to her feet, for it flashed across her mind that she had never before seen a rabbit with either a waistcoat-pocket, or a watch to take out of it, and burning with curiosity, she ran across the field after it, and fortunately was just in time to see it pop down a large rabbit-hole under the hedge.
In another moment down went Alice after it, never once considering how in the world she was to get out again.
The rabbit-hole went straight on like a tunnel for some way, and then dipped suddenly down, so suddenly that Alice had not a moment to think about stopping herself before she found herself falling down a very deep well.
Either the well was very deep, or she fell very slowly, for she had plenty of time as she went down to look about her and to wonder what was going to happen next. First, she tried to look down and make out what she was coming to, but it was too dark to see anything; then she looked at the sides of the well, and noticed that they were filled with cupboards and book-shelves; here and there she saw maps and pictures hung upon pegs. She took down a jar from one of the shelves as she passed; it was labelled “ORANGE MARMALADE”, but to her great disappointment it was empty: she did not like to drop the jar for fear of killing somebody underneath, so managed to put it into one of the cupboards as she fell past it.
New carousel layouts
Two more layouts for an image carousel, teasing more of the available slides
New carousel layouts? But we already had two different versions?
Yes, we did, but we felt they could be improved by displaying more of the other slides as well, giving more of a caroussel feeling to it. So we had two more layouts developed; a centered mode and a multiple items mode.
Both can be seen below.


